Quick Coloring Tutorial In Photoshop Using Layers

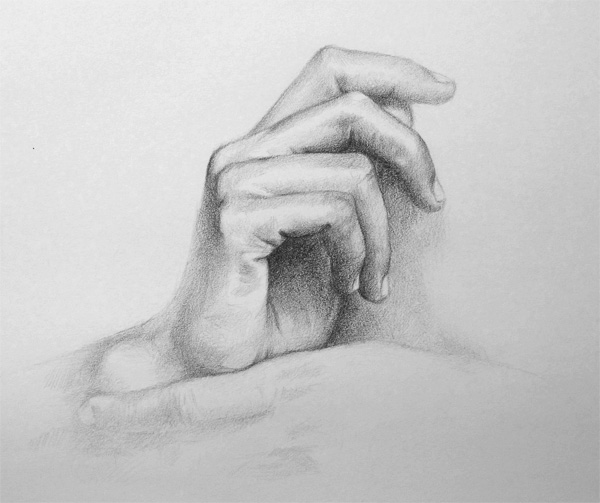
Looking the hand sketch that I did, I can’t help to do a quick Photoshop color on it. The sketch was somewhat light in value so it is looking a little bland. For a quick fix to that and some color work, I have used the same Photoshop coloring techniques as before.
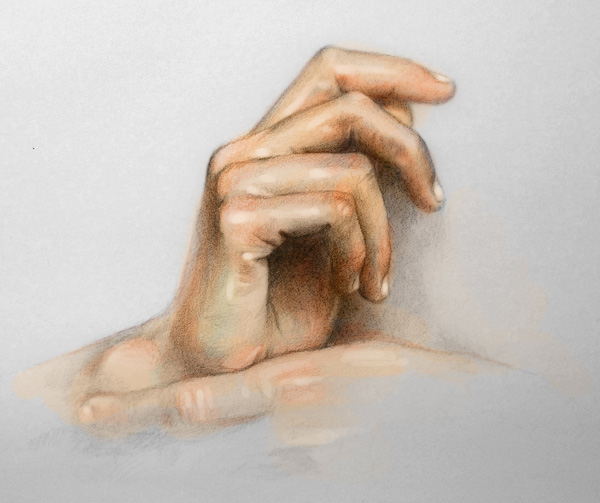
Hand Drawing Colored in Photoshop Using Layers Technique

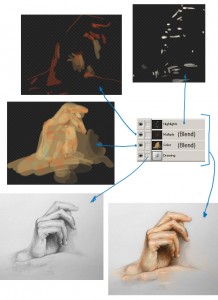
Again, using layers in Photoshop, you can add color very quickly. At the very bottom of my layers is my original hand drawing. Right above that is my color layer. I use the Color Blending mode for this layer. That Color Blending mode is similar to doing a translucent watercolor wash over your black and white sketch. The colors using this blending mode will appear rather light. So right above that I use another layer in which I add in darker tones. I use the Multiply Blending mode for that layer. The Multiply Blending mode adds your current values into all the layers below. It is very useful mode for adding darks to your painting. Then lastly, above everything else is my highlight layer. This is just a normal layer where I put in highlights. This helps to give it some sparkle and shine to the hand.

I also added in some blur to get a more focused effect on the hand using the Blur tool. That is not shown in the layers here. There are so many effects and tools that you can use and experiment with in Photoshop that sometimes it takes away the art of it. I try to minimize the use of effects tools in Photoshop and just get to the very basic painting tools.
The Importance of Drawing the Hands

I remember I hated drawing hands. To avoid drawing them, I would pose the characters that I was sketching in a way that would have their hands hidden. That saved me a lot of time by not having to draw all those joints and fingers. Now I know what a mistake that was. I did not realized then that I was depriving my character of their expression. It was only through learning and doing 3D animations did I realize the fantastic expressive nature of the hands.

Drawing the Hand for Expressions

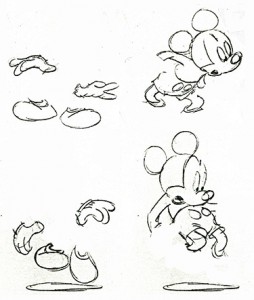
Mickey Mouse with Hands and Without to show the exressive nature of the hands and feet.

In many examples given in animations, especially from the traditional Disney animators, they show how just drawing the hands and feet alone gave more expression to the character than with the whole body without the hands and feet. In this sketch of Mickey Mouse, notice how the hands and feet alone tells so much about his pose and expression. You can feel the action with just the hands and feet.

The hand with all its fingers, joints, and planes, is a very difficult part of the body to draw. I struggle with it all the time, but when I spend the time on it and get it right, my drawings and characters comes to life. It is definitely the area to concentrate on for your drawings. On my quick sketch of the hand above, you can see how expressive that hand gesture is. With just one hand, you can feel the movement. I feel that the hand (the person) is contemplating.

To practice drawing the hand, you can look for images or better yet just take a picture of your own hands. In whatever lighting situation you might have for the photo, I do recommend that you have enough contrast in your scene. That will help to bring out the complex forms. That means you need to a smaller light source and not large area lights. If the lighting is too flat, the details will get flooded or washed out by the large area lights, making it harder for you to see the forms. Okay, now I am going into photography so I will stop now=).

If you are not doing so already, definitely put more attentions to the hands and feet. It will pay off big time.

Why Do People Love Drawing Eyes?

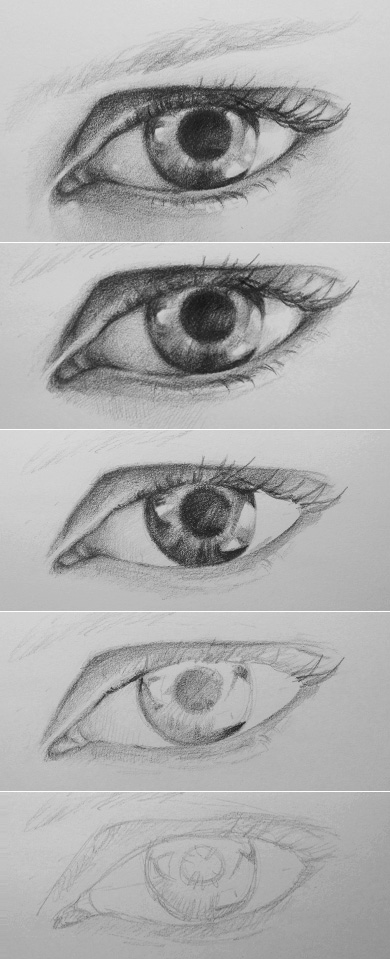
Drawing the Beautiful Eye

Step by Step Drawing of the Human EyeWhat is this fascination with drawing eyes? There are probably thousands of tutorials out there on how to draw an eye. So I decided to sketch one too, just to see what it is all about. I’ve sketched eyes before but that was long time ago. My most recent sketch of a large eye was on my Anime Face Drawing.
I think people have a fascination with eyes is because when drawn correctly, it is a thing of beauty. The eye’s gaze is very expressive, and it tells all. We all love to look into and be mesmerized by a beautiful eye. And I think it is that attraction that draws people into drawing eyes. We are so accustomed to staring into eyes that even a drawing of an eye will garner that attention and reaction.

The eye is a simple thing to draw. There is no repetition, you only need to draw one eye and you are done. You don’t need to worry about shadows much. Just make sure you use an Electric Eraser to get some sharp and clean highlights. The eye needs to sparkle, or else it will look dead. The iris reflects the environment, so you can make it however you like. You can make the pupil large or small, it is still attractive either way. But don’t make it too small or else it will look like she is Hulking Out. And lastly, don’t draw the eyebrows, because if you make it too dark, it might start looking like Charlie Chaplin.

So that is it. Now I have an eye drawing too. It gets to be lumped into the millions and millions of eye drawings out there.


How to Draw the Eye

Tracing and Reference Marks for Portrait Drawings

Previously I talked about the necessity of drawing from references. This time I want to push it even further and suggest that you trace as well. I am not suggesting to flat out trace something when you are still in school or just learning to draw. I mean to use tracing in order to speed up your drawing process when you are already able to draw by eye. This applies mostly to portrait drawings.

Say you want to do a portrait drawing of someone. Obviously you would want your drawing to LOOK like the person you are drawing. And most artist would tell you how difficult that is. The face is extremely complex and if you have enough of their proportions wrong it won’t look like that person. You can start sketching by eye and eventually get to a point where you think the proportions and features are all in the right places. Then you spend hours shading only to realized that something is off. Now you are screwed. A more efficient way is to trace and make some reference points for the main features at the beginning.

Making reference points will ensure that you have the correct proportions to begin with. Now you can draw in the rest and feel SAFE that it will look like that person if you shade it correctly. You can trace as much of the features as you like. People generally do not care if you have traced it or not. But they will care if it does not look like the person you are drawing. So spend the time making the drawing look and feel the way you want it to, not hours on getting the proportions correct.

Lastly, most people do not look like Charlize Theron or supermodels, so take some liberty with the features and make the person you are drawing Prettier!

The Tracing Process
Since most of my portrait drawings are from digital photos, I will make a simple black and white printout of the face. This usually takes several tries as I need to scale the image to the exact size that I want to draw at. Then once I have that printout with the correct size, I will trace and make some reference points with my lightbox. My lightbox is only about 9 x 11″, but it is big enough as I just need some very simple reference points for the corner of the eyes, nose and mouth. Most of the features I can fill in. Just some simple points and it saves me about half an hour of going back and forth with the proportions. I don’t do this often as most of my portraits drawings, like the Model 1 drawing, are just for fun so I don’t need great accuracies. But when I do need it, that is what I do.

Painter Igor Kazarin – Dry Brush Portrait Master

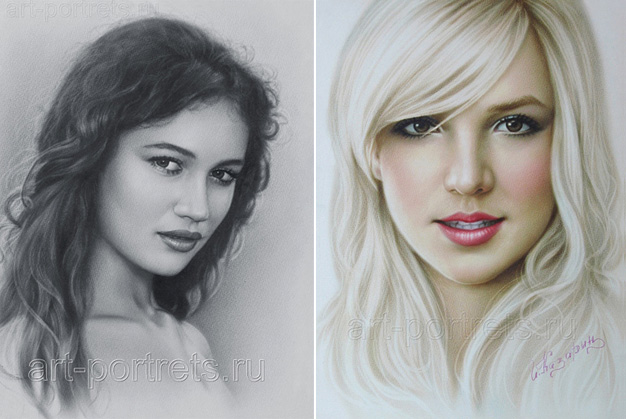
I came upon the artworks of the Dry Brush portrait master, Igor Kazarin. You have to check out this technique and his work. It is simply amazing. The speed at which he is able to paint a portrait with this dry brushing technique is mind-boggling. About 5 hours for a portrait! You have to see this to believe it. Time to get some paints and brushes!

From Igor Kazarin’s website:

Igor Kazarin Dry Brushing Painting Techniques


What is a drybrush technique?

Dry brush technique is a modern style of painting in which oil paint, bristle and synthetic brushes are used on watercolour paper or fabric. A few drops of solvent is used as well and a rubber eraser for highlights and details.
Why it is called Dry Brush technique? Black oil paint (of any kind) is squeezed from the tube onto the palette, only a little bit and if desired, 2-3 drops of domestic sewing machine lubricating oil or diesel fuel is added as solvent. Slightly touch the paint with the paintbrush and rub it on a palette so that the brush is actually almost dry.

For a black and white portrait about 0.5 cubic centimeter of black oil paint is enough. Then apply a very thin layer of paint on watercolor paper or fabric. The result: the surface is not greasy when you touch it, therefore you can frame it or roll it up for transport without a frame. At first glance Dry Brush is very similar to pencil portraits. In fact, pencil is actually used: some artists depict the picture initially by drawing a pencil sketch and only then do they start using a brush with oil paint; while other artists do not use pencil at all and use dry brush technique from start to finish – like some of the artists of Moscow’s Arbat street used to do. The most important feature of dry brush technique is that it allows speed drawing with excellent quality in a very short time, so a portrait artist can earn much more money this way than using any other drawing techniques

You can continue this Dry Brushing technique article through Igor Kazarin’s Website.