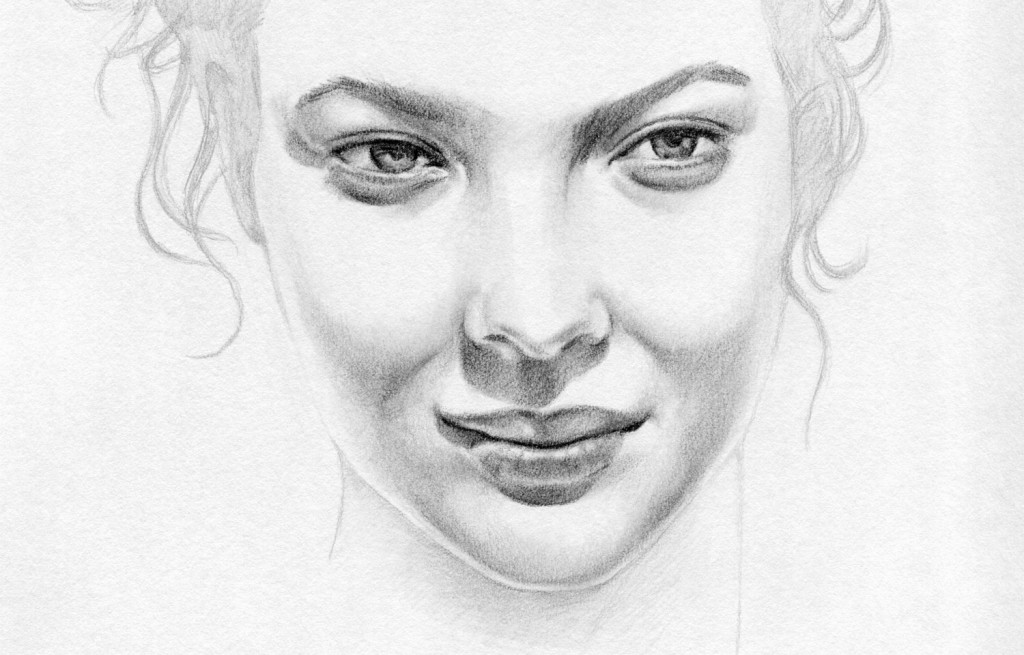
A quick sketch of a woman’s face. Click on the image to see it in high res. You have to see it at full screen! It looks a lot better for some reason when it fills the screen. I think it is the texture of the paper and also the way it is cropped. I will definitely paint this one up in Photoshop.
The Joker – Photoshop Painting
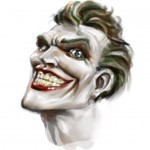 I looked around and found a cool little free software that allows me to do video screen captures. So I did another quick Photoshop painting of the Joker in low resolution. Just to continue what I was talking about in the previous post. The image here is where I stopped. I will probably spend more time of it later on and finish it up as it is looking a little promising.
Here is the video, played 4x faster. Oh, I also have a new Videos section where you can see my other videos. You gotta love WordPress, they make things easy to setup. Anyhow, hope you like it, more to come… thanks, -Wei
http://youtu.be/gq9IHRDm6iM
Photoshop Painting of the Joker – Original Sketch by Comic Artist Brian Ching
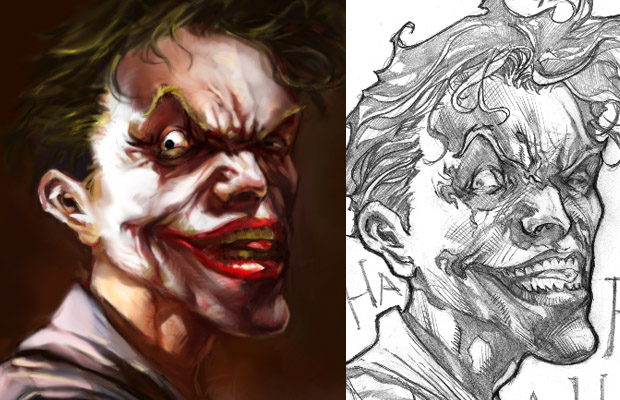
Looking through my older paintings and I found this Joker painting done in Photoshop. I love the way this painting turned out, and it was kind of cool to do because I took the original sketch from the comic book artist Brian Ching. I met Brian at a recreational tennis class and he is the only comic book artist that I know personally. I was a comic book fan all my life so it is a real treat to know someone personally that is working in the comic industry. You can check out his work at Brian Ching Comic Art.
One thing I love about comic book drawings is the way they shade it. The shading is always clean because it needs to be easily read by the colorist. And the dark areas are usually still very light so it gives it a real artistic look. The crosshatching is very clean and looks like a lot of “flicking” of the risk. It’s cool stuff.
But there is another reason why I dug this painting up, and that is to talk about the advantages of painting in low resolution in Photoshop.
Painting at Low Pixel Resolution Equals Fast Painting
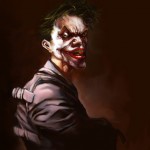 The painting was done rather quickly. I don’t remember exactly, but it probably took about an hour. It’s pretty rough but I liked the results. Another hour or so and it would be polished. The reason it went quick was because I painted it at low resolution. The painting is only 852 x 1280 pixels, which is low for a painting, but sufficient for a quick study. Everything goes faster in Photoshop when you are working in low res. All the tools respond lightning fast. Even intensive CPU processing tools like smudging works without any delay. So the process is quick and fluid. Try using a big brush on a high res image like 6000 x 6000 and you might experience some lag. Obviously a more powerful computer will alleviate some of that, but with multiple layers on a large image, you will most likely get some lag at some point during the process.
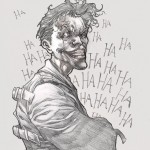 One method I use and something you might want to try if you haven’t is to start painting at a lower resolution. Then once you have it painted like 75 percent of the way, scale the image up to your final high image resolution. Then finish up your painting from there. This scaling up will blur your image a bit, but that’s okay because you are going to finish it up with more details anyways. And it is pretty quick to repaint and sharpen up areas. Overall, I love painting in low res as it feels very fluid and free.
Click on the images above to see it at full resolution. And thanks to the best tennis player I have ever played with, Brian Ching, for providing me with one of his cool sketches! He’s a 6.0 tennis player. I would consider myself 3.5 as I always lose to 4.0 players. So you can imagine what it’s like playing against 2.5 points higher! But it’s fun, well, at least for me.
3D Modeling on the Lady Dragon Resin Statue

I’m going to switch gears a little and take a break from the drawings and talk about my Lady Dragon Statue.
As I am working through issues and details with the factory on the manufacturing of my first collectible statue, The Lady Dragon, I want to show you some of my 3D modeling process. Looking back, it really was a trial by fire. I have done 3D modeling at various times throughout my career. But it wasn’t until I worked as a 3D modeler for feature films did I really sharpened my modeling skills. It took everything I have learned in my previous work experience to actually get to this point. My process might seem a little odd to other model makers, as I don’t use clay, zBrush or Mudbox exclusively. My modeling is mostly done in Maya. So anyhow, here is my process.
Making the Lady Dragon Statue (Click on image to enlarge. Thumbnails has been cropped)
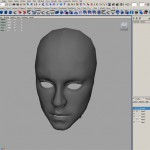 It all starts with the face. This is done in Maya. 90% of the modeling was done in Maya. This initial stages of the face is rather crude and very low poly, but that is how all my modeling starts. I start with a very low poly stock model that I have in my references. Then start building more and more forms and details to it.
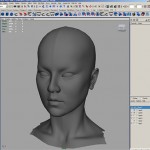 Here is the refined face with more anatomically correct features. Reference is everything and these were some of the pretty faces that I have referenced. The 3D model has been subdivided. All my modeling starts with low geometry and ends with medium res geometry. If you are not familiar with 3D modeling, this sounds like mumble jumble, but that’s okay, it’s not important for this post.
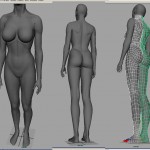 After the head is somewhat done, I move onto the body. I have many base models to start from for the female body, but what you see here has been heavily modified to fit my needs. For posing, I use 3DSMax. That is the program I am most familiar with. I use that for rigging, animations, lighting and rendering. I only use Maya for modeling as their modeling tools, in my opinion, is better than 3DSMax’s.
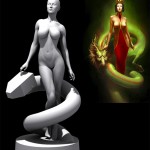 Here I have her rigged and posed and started on placing in the dragon. Working the dragon into this statue was a real challenge. The curl of the dragon in the painting looks fine, but it does not translate well into 3D. Had I posed it like it is in the painting, the dragon would have been too large and would definitely overpower the figure. My main focus is her body and pose, so I had to trim down the dragon.
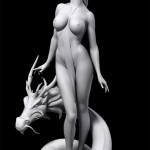 This is much closer now. The step from the previous image to this stage is HUGH. Massive amounts of modeling to get that generic body into this body where the musculature is anatomically correct for her pose. The most difficult process was in this stage. References are CRUCIAL at this point. Your muscle changes with each movement, and if you don’t get it right, your statue will look DEAD and WEIGHTLESS. I’m not a master statue sculptor, so I struggle with this a lot. But with good references, it is very doable. The original dress design was to be a simple thin drape down her body leaving her breast exposed. I was advised to cover up the breast so that it will be marketable to a larger audience. Subsequently, the dress design was changed to cover up the breast, but with a cast-off feature. Best of both worlds I guess.
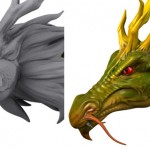 This is the dragon design that I started with. It is based on the traditional Chinese dragon design, as it was in my painting. The details were added in using Mudbox. I know most people use zBrush, but Mudbox was the software that I have used when I was working on the Hulk feature film. So Mudbox was the natural choice for me. The right image is the dragon with texture. That was also painted in using Mudbox.
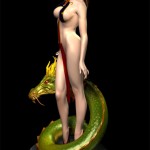 Finally, my first version of the Lady Dragon was complete. Fully modeled and textured in 3D. The base is relatively simple looking, which was my intention so that it does not distract from the main focus of the statue, which is her body. If I do have any style, it would be that I like to keep my art simple.
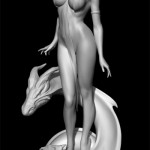 Another big jump here as this is the final model for my Lady Dragon statue. The dragon was changed completely in order to make it more modern. The previous traditional Chinese dragon looked more and more like an ornament that you would pick up at a souvenir store. Overall I think it was a positive change. The new dragon design is sleeker and looks more bad-assed. Another step forward was the face. It might be hard to tell between this and the previous image, but the face was improved drastically. My previous Asian features were too light. Though it looked okay in the rendering, her features would have faded away as a physical statue. Therefore, her final facial features were emboldened, while still keeping her Asian look. Base was also simplified a step further.
That’s it for now. Hope this was interesting to you. There were a lot more steps in between but this is the meat of it. It was a hell of a lot of fun modeling this. It is awesome to see your own creation come to life! I love making my own creations because a lot of my ideas come during the process and not before. I just go and enjoy the ride and see how it comes out. I think this Lady Dragon statue worked out quite well. Now I just need to get all the little kinks worked out with the factory so that I can concentrate on modeling my next statue which will be the Red Assassin Statue, Thanks, -Wei
TOS Andreas (Sherry Jackson) Drawing in Color
Sometimes I just can’t leave my drawings alone! One thing that bothered me with my Women of Star Trek Andreas drawing was that it lacked some likeness to Sherry Jackson. Something about the eyes in the sketch that did not look like her. So I decided to paint it up in Photoshop. This painting was a little more involved. I started with the same process in Photoshop with my sketch, color, and multiply layers as mentioned in my previous quick coloring post. Once I have that, I keep refining it until it looks painterly.
Now that the face of Andreas is painted, it is looking a lot more like Sherry Jackson. I didn’t want to paint up the whole drawing so I composited the color version over the sketch with a mask and gave it some design element. It’s probably more interesting this way. Who knows, maybe I will modify it in the future. You always have that option with digital paintings in Photoshop.
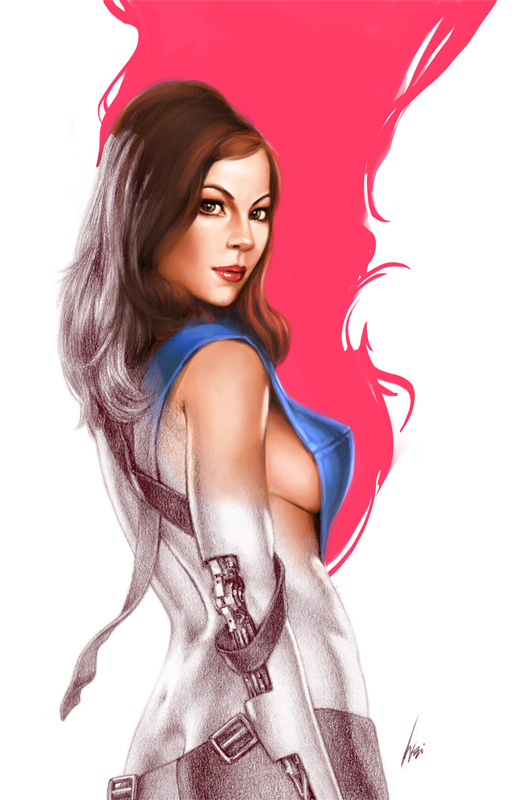
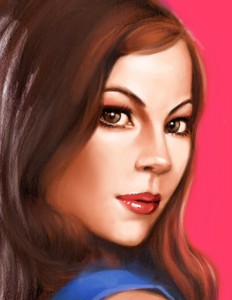 Here is the actual resolution that I painted it at in Photoshop. You can click on it to see it larger. It is relatively low res for a painting. But I don’t intend to print it so the resolution is sufficient. If it was for print, I would at least double the resolution. That would allow me to paint in more details especially in the eyes. The last thing you want is a blurring looking eye in a print. Anyhow…
I think I can finally put this piece to rest now. It finally looks like the Sexy Sherry Jackson as Andreas! It now feels complete!
