A Wacom Cintiq has always been near the top of my wish list for expensive toys. I went ahead and got mine recently after getting hooked at the Wacom booth during Comic Con. I got the Wacom Cintiq 22HD and I can tell you that this is not a toy, or a luxury item, it’s a serious and essential tool for a particular kind of artist. Here is my review of the Cintiq 22HD ($1999) with some comparisons to the Cintiq 24HD model ($2599).
Wacom Cintiq 22HD Review
Packaging and Content
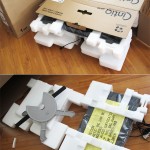 With expensive sensitive electronics, purchasing online and having it arrived safely is always a concern for me. Returning damaged items or contacting the manufacturer on warranty claims is not my idea of fun. Luckily for me, Wacom has packaged their Cintiq well. The package is double boxed– though there is no cushioning between the boxes–but seems to provide ample protection. The monitor and stand is individually protected with cushioning foam. Package is about 20 lbs.
The package consist of the monitor, the stand, stylus pen and holder. I won’t bore you with the technical stuff. You can read more tech stuff on Amazon’s or Wacom’s page. Let’s get to the more important stuff.
Screen Size and Resolution
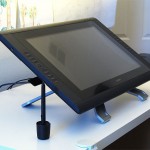 The Cintiq 22HD screen area is about 10 1/2 inches tall and almost 19 inches wide. Having worked with it, the height of the screen area is on the borderline of feeling short. It is like the height of a regular sized paper, so it’s not that spacious. But it’s acceptable because when I draw, I tend to draw in one given area most of the time. For example, when drawing on paper, if I need to draw near the top of the paper, I don’t extend my arm up to draw in that area. Instead, I will position the paper lower so that I can draw with my most comfortable hand position–about 8 inches from my chest. Therefore the short screen height is acceptable to me.
The screen resolution is 1920×1080 pixels. For a 22″ widescreen, it looks okay. I don’t see any problems at this resolution. Just for comparison, my 17″ widescreen laptop display is 1920×1200 and it feels sharp. The 24HD model has a resolution of 1900×1200. In terms of sharpness, there’s no difference between the 22HD and the 24HD. I tested the 24HD model at Comic Con and the extra screen space did feels better–almost perfectly sized.
The Cintiq 22HD Stand
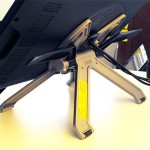 The stand is one of the major differences between the 22HD and the 24HD. If you are very particular about your posture and drawing positions, like I am, do consider the differences seriously. Here’s why. The 22HD model uses the same stand as the older 21UX model. This stand allows you to go from laying the screen almost flat to your tabletop to almost vertical. If you plan to use the Cintiq while sitting and have the screen laying flat on the tabletop, then I would highly recommend the 24HD. With the 22HD stand, you might not be able to get the screen close enough to your body. If you lay the screen all the way down and pull the screen toward you to the very edge of your table, the center of the screen is about 10 inches away from your body (or edge of table). That distance for me is too far. I would have to tilt the screen toward vertical to get the center drawing area closer. The 24HD stand solves that problem.
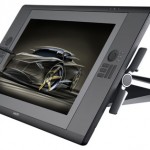 The 24HD stand is totally awesome–and massive. It has two rotational joints so you can lower the screen over the edge of your desk and have it drop toward your lap. This allows the screen to get as close to your body as possible, which again I think is a more natural drawing position for most artist. With 22HD stand, you can’t do that.
I like to stand when I draw, so I don’t have any problems with the 22HD stand. I actually constructed a simple standing table using four pieces of tabletop boards that I got at IKEA at $6 each. It’s at the perfect height so it is very comfortable for me. But if you like to sit while drawing, seriously consider the 24HD as it offers you a multitude of adjustments to fit your posture preferences. If you do go with the 24HD, you will need over 30″ of desk space as it has a large footprint–the 22HD takes up 25″.
Lastly, the 22HD can be rotated clock-wise and counter clock-wise to the stand. But the rotation is rough as it is the hard plastic casing of the screen rubbing against the metal stand. Not a smooth rotation. I doubt many will use this feature.
ExpressKeys
The 22HD has16 user-assignable keys with two touch strips on the back. The ExressKeys are a must, but 16 seems like an overkill. As of now, I’m just using Wacom’s default assignments. I haven’t had a need to program them yet. I use Photoshop so the main keys I use are the Ctrl, Alt, and Space-bar. Those are already assigned by default. I’ll definitely look into them more and make my own assignments, but the point that I want to make is that these ExpressKeys can never replace the keyboard. If you use Photoshop, then you probably have many hot-keys that you use regularly, like Ctrl-A (select all), Ctrl-d (deselect), Ctrl-c (copy), Ctrl-v (paste), …etc. There are just too many to program into the ExpressKeys, and even if you do, I think you would find it confusing. I will eventually buy a separate compact keyboard that I can use with the Cintiq. That is probably the best solution.
The Feel of the Cintiq
This is where it all counts. All the extra features don’t mean much if it doesn’t feel natural. And yes, the Cintiq feels natural. The Cintiq stylus sensitivity feels the same as the Intous tablets. The major, and crucial, difference is that with the Cintiq, you have hand-eye coordination–that is a big deal. That’s what make this thing feel natural. The Wacom tablets allows you to use your hand-risk skills and do things on the computer that will be difficult to do with a mouse, but there’s a limiting factor of not having hand-eye coordination. With the Cintiq, I noticed that I rarely use the undo option. The reason is that I get the stroke I want on the first try–thanks to my hand eye coordination. That is not the case with the tablet. On the tablet, I feel the art process was more about manipulations, with the Cintiq, I feel like I am drawing. Having experienced both, I feel that there is no valid comparison between the Cintiq and the Intous tablet–they are totally different tools. It’s apples and oranges.
Do You Need a Cintiq?
Prior to my purchase, that’s the question I have been asking myself. From an artist point of view, here is the deciding factor if you are considering one. If you’re a tradition artist and you want to use the skills you already have and apply it to the digital world, then yes–a big yes–to getting the Cintiq. There is nothing like it out there. The feel is natural and real. It’s for drawing and painting. If you’re very technical and prefer to create art through tools and manipulations, then no, the Cintiq will probably not enhance your ability to create art.
At $2000 for the Cintiq 22HD and $2600 for the Cintiq 24HD, it’s a big investment–but it’s worth it. Having worked with one now, if I had to make the choice between the 22HD and the 24HD, it would be a coin toss for me. I can go either way. The larger 24HD might be attractive but I actually prefer something more compact for desk space purposes. It would be great if the 22HD came with a stand like the 24HD. Regardless of which model, the Cintiq will prove to be a necessity for some. I’m one of them, and I’m glad I finally took the plunge.
Hope you find this review helpful in determining if the Cintiq is right for you. I’ll be posting some videos on the performance of my Cintiq 22HD shortly. One of the concern is the lag and response time from the stylus. I’ve found it to be acceptable. You’ll see what I mean when I post the videos. Thanks, -Wei
Previous post: Trying out the New Cintiq 22HD.







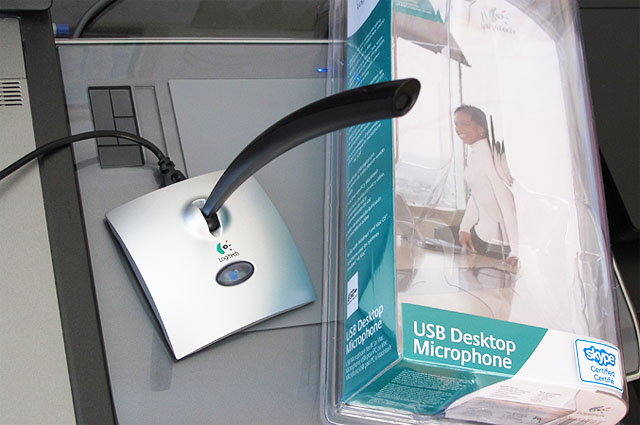
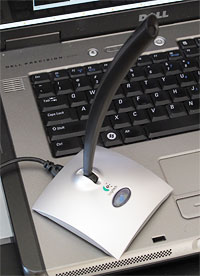 The Logitech USB Desktop Microphone is fairly light weight; about the weight of a wireless mouse. The wide base makes the mic sturdy. It sits nicely on my laptop during my recordings. The mic stands about 8 inches tall and can pivot at the base. The pivoting feature is a big plus because you can point it toward you no matter how you sit. It also has a power button so you can save energy when it is not in use.
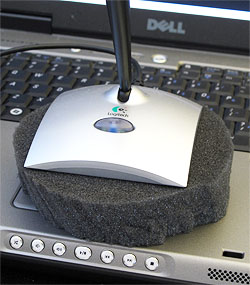 When I did some recording test, I noticed that there were some rumbling noise being picked up. Since the mic was placed directly on my laptop, it was actually picking up the hard-drive noise. I placed a piece a of foam between them and that did the trick.