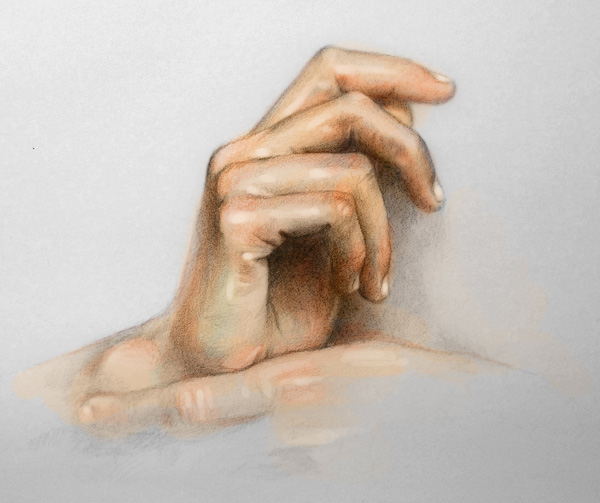
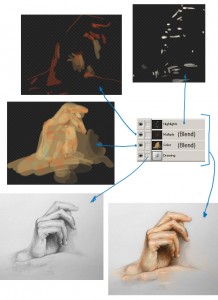
Looking the hand sketch that I did, I can’t help to do a quick Photoshop color on it. The sketch was somewhat light in value so it is looking a little bland. For a quick fix to that and some color work, I have used the same Photoshop coloring techniques as before.

 Again, using layers in Photoshop, you can add color very quickly. At the very bottom of my layers is my original hand drawing. Right above that is my color layer. I use the Color Blending mode for this layer. That Color Blending mode is similar to doing a translucent watercolor wash over your black and white sketch. The colors using this blending mode will appear rather light. So right above that I use another layer in which I add in darker tones. I use the Multiply Blending mode for that layer. The Multiply Blending mode adds your current values into all the layers below. It is very useful mode for adding darks to your painting. Then lastly, above everything else is my highlight layer. This is just a normal layer where I put in highlights. This helps to give it some sparkle and shine to the hand.
I also added in some blur to get a more focused effect on the hand using the Blur tool. That is not shown in the layers here. There are so many effects and tools that you can use and experiment with in Photoshop that sometimes it takes away the art of it. I try to minimize the use of effects tools in Photoshop and just get to the very basic painting tools.

