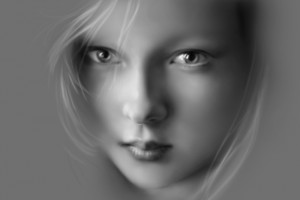
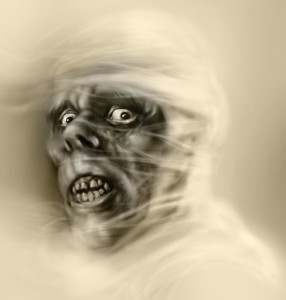
On my previous post, I had a couple of face paintings using a soft airbrush technique in Photoshop with the Cintiq 22HD. Here I made an eye painting video to better illustrate the technique. Starting with as large of a brush size as you can get away with, softly build up the values. I suppose it’s similar to dry-brushing. It’s easier if you start with a middle grey background and go from there.
Category: Art Post
Soft Airbrushing on the Cintiq 22HD
 I did couple of soft airbrushing paintings on the Cintiq 22HD. Part of the reason was to test the sensitivity on the Cintiq. It feels the same as the Wacom Intous tablets but the results I get on the Cintiq is softer because of greater hand control.
For these paintings, I used the aribrush in Photoshop with an airbrush opacity at about 25% with a flow of about 30%. With that low opacity flow, you can slowly build up the form with multiple strokes. Just think of it as if you’re using a real airbrush, where going too dark is a big no no since you can’t go lighter.
Pretty Girl’s Face and the Mummy
On the girl’s face, it took me about an hour to do. Starting with pure black on the airbrush, I slowly painted in the darks. Then using pure white to bring out the highlights. My goal was to create all the different shades of grey by varying the pressure of the stylus. I was successful at that, but I did end up doing some corrections by apply the backgroud grey to fix certain areas that I went too dark on.
 For the Mummy’s face, it was a lot messier and I went back and forth more. The details made it difficult to get it correct on the first try. This was referenced from one of Basil Gogos’ monster sketches.
In conclusion, I think this soft airbrushing technique works great with the Cintiq. The stylus is sensitive enough where you can build up smooth areas with multiple strokes and still keep your stroke lines blended. I like the result and I’ll be doing more of these types of paintings. The process goes fast enough that I’ll be able to do a video on this technique soon.
Related Posts
Cintiq 22HD Review
Cintiq 22HD Video Review
Cintiq 22HD Stylus Sensitivity Video Review
Wonder Woman and Witchblade Paintings on the Cintiq 22HD
Following my Black Widow painting for my wife’s friend, I had a couple of request to paint them as superheroes as well. Since the subject matter was what I wanted to paint, I ended up doing a couple of commissions on it. I painted them on the Wacom Cintiq 22HD.
Wonder Woman and Witchblade Paintings
 For this Wonder Woman and Witchblade paintings, the process was similar. I started with their portrait and then I would find a suitable pose for them my reference library. Rarely does the reference matches exactly what I want it to be. But that’s okay because what I’m after are lighting references. I’ll try to figure out the lighting based on any pose changes from the reference. I use to be horrible at this but with practice, I can see that I’m getting better at making things up. Still feels awkward but it’s getting there.
 With the Witchblade painting, the portrait was from a flash photo, resulting in flat lighting. I had to change it to what you see here, with the lighting from the side. That was the trickiest part. I’m calling this Witchblade because it was referenced from that character. I played around with it and did my own costume. It’s closer to the Japanese version of Witchblade, Takeru.
If you’re interested in such a painting for yourself, I am open to commissions. It’s not something I’ve done a lot in the past, but now that I’m getting back to painting, I’m more open to the idea. Sexy ladies only. Just contact me.
Hatching, Cross-Hatching, and Hand Control
Hatching and Cross-hatching
Quoting from Anthony Ryder’s The Artist’s Complete Guide to Figure Drawing, “Hatching is a shading method that employs lines in series, arranged in shaped progressions, and either parallel or radiating. Hatching is a rhythmic activity; the pencil moves like a sewing-machine needle. The trick is to get lines evenly spaced, gradually increasing or decreasing in length, and in the right value range and progression…Cross-hatching is hatching on top of hatching, with the layers of hatching crossing at an angle. There’s no limit to the number of layers if cross-hatching that can be applied in the drawing. To “mist” a drawing with a value, cross-hatching can be done very softly, as if you were applying washes of value with a brush rather than individual lines with a pencil. A finished drawing is a composite of many such “mistings” of value, carefully fitted into the contour.”
I love Anthony Ryder’s book and his description of hatching and cross-hatching techniques. His use of “misting” to describe the shading method really hits home. That’s what shading is all about, layers and layers of mistings. You should check out his figure drawing book if you haven’t. His masterful shading is very inspirational.
How to Improve Your Hand Control
To be able to do hatching and cross-hatching, you need to have good hand control. Many drawing books seems to glaze over this area. I suppose we take hand control for granted as it’s something so basic to all artist. But if you’re a beginner artist, I’m sure you struggle with hand control. Your shading might be inconsistent, or too monotone and dull. You probably have uneven shading on large areas. It’s a tough thing to do, and I still struggle with it sometimes, especially on large areas. But with practice, you’ll begin to have a much better feel of your pencil rubbing against the surface of the paper. Soon you’ll be able to perform minute pressure adjustments to get the correct “misting.” So here is a couple of exercise that you can do to improve your hand control. I know this will help if you’re a beginner artist.
Hatching, Cross-Hatching, and Hand Control Exercise Video
Painting on the Cintiq – Basil Gogos’ Frankenstein
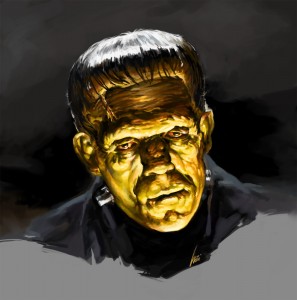
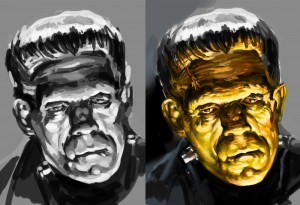
I wanted to play with colors on the Cintiq and what better than to copy one of Basil Gogos’ monster paintings. The painting is referenced from the book, Famous Monster Movie Art of Basil Gogos. I still carry some of them in my store. His monster art is colorful and haunting–just an awesome use of colors. I was only able to capture a fraction of the expression and mood in the original painting.
You learn a lot by copying other people’s art. Try it sometimes if you haven’t–it’s worth your time. With close observation, you will start to decipher their art process. In this case, it is a little different as I’m working with a digital medium. But nonetheless, my intense observations of Basil’s painting offers clues to his process. These kinds of exercise is priceless.

